ഇനി തൊലി കളയണ്ട! വെളുത്തുള്ളി തൊലി കളയാതെ ഈസിയായി പൗഡർ ആക്കി വർഷങ്ങളോളം സൂക്ഷിക്കാം; അടുക്കളപണി ഇനി എന്തെളുപ്പം!! | Homemade Garlic Powder
Homemade Garlic Powder
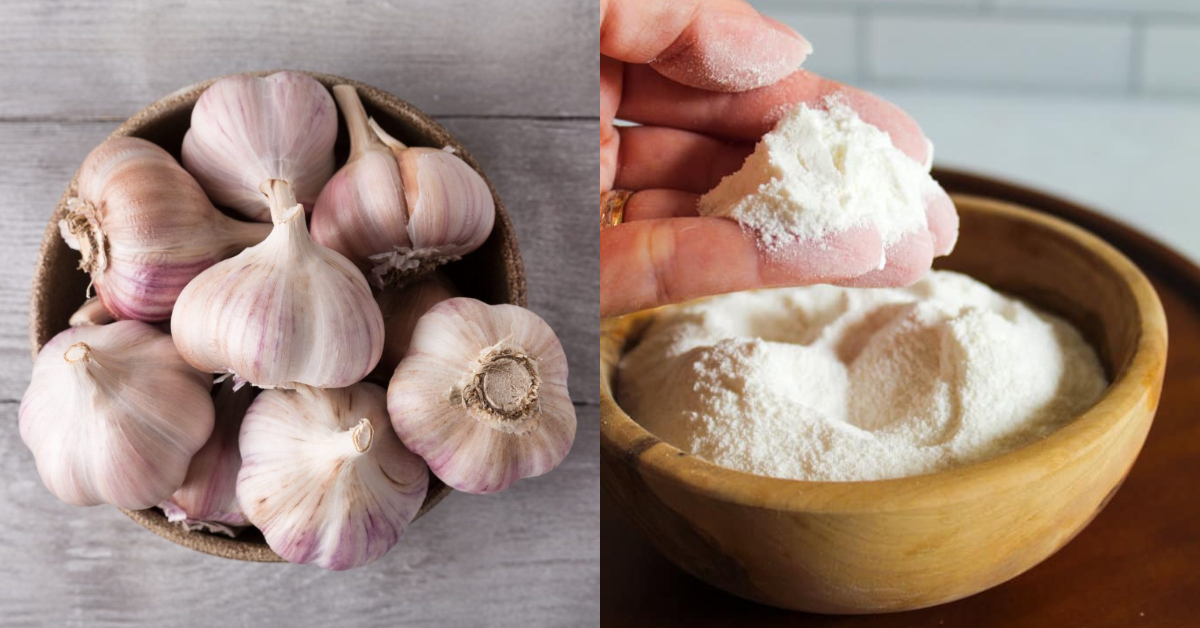
Homemade Garlic Powder: Fresh, Flavorful & Long-Lasting Kitchen Essential
Homemade Garlic Powder : Homemade garlic powder is a simple way to keep real flavor on hand without preservatives. By drying and grinding fresh garlic, you get a pure, aromatic spice that enhances curries, soups, and snacks. It’s affordable, long-lasting, and packed with the natural health benefits of garlic — from boosting immunity to improving heart health.
കുക്കിങ്ങിൽ എപ്പോഴും മെയിൻ ആയിട്ടുള്ള ഒരു ചേരുവ തന്നെയാണ് വെളുത്തുള്ളി. വെളുത്തുള്ളി ചതച്ചും അതുപോലെ തന്നെ പേസ്റ്റ് രൂപത്തിലും ആക്കി നമ്മൾ പല കറികളിലും അതുപോലെ അച്ചാർ ഉണ്ടാക്കുമ്പോഴൊക്കെ ഉപയോഗിക്കാറുണ്ട്. എന്നാൽ ഇത് വെളുത്തുള്ളി പൗഡർ ആക്കി ഉണ്ടാക്കിയെടുത്ത് വെച്ചു കഴിഞ്ഞാൽ വളരെ എളുപ്പം കുക്കിംഗ് ടൈം സമയത്ത് നമുക്ക് ഉപയോഗിക്കാൻ സാധിക്കും.
Top Steps to Make Homemade Garlic Powder
- Peel Fresh Garlic Cloves – Remove outer skin completely.
- Slice Thinly – Even slices dry faster and more evenly.
- Sun-Dry or Oven-Dry – Dry until crisp with no moisture.
- Grind into Fine Powder – Use a clean blender or mixer.
- Store Airtight – Keep in a glass jar away from moisture.
ഗാർലിക് പൗഡർ ഉണ്ടാക്കാനായി ആദ്യം തന്നെ വെളുത്തുള്ളി കഴുകി വൃത്തിയാക്കിയ ശേഷം അതിന്റെ തൊലിയോട് കൂടി തന്നെ മിക്സിയുടെ ജാറിൽ ഇട്ട് ഒന്ന് പൾസ് ചെയ്ത് എടുക്കുക. ജസ്റ്റ് ഒന്ന് ക്രഷ് ചെയ്ത് എടുത്താൽ മതി പേസ്റ്റ് രൂപത്തിൽ ആക്കേണ്ട. ശേഷം ഇത് പരന്ന പാത്രത്തിലേക്ക് ഇട്ടുകൊടുത്തു നല്ല വെയിലുള്ള സ്ഥലത്ത് വെച്ച് നന്നായി ഉണക്കിയെടുക്കുക. ഉണങ്ങി വന്ന ഈ ഒരു ഗാർലിക് മിക്സ് നമുക്കിനി മിക്സിയുടെ ജാറിലിട്ട് ക്രഷ് ചെയ്തെടുക്കാം.
ഇങ്ങനെ ക്രഷ് ചെയ്തെടുക്കുമ്പോൾ വളരെ പെട്ടെന്ന് തന്നെ നമുക്ക് ഗാർലിക് പൗഡർ ഉണ്ടാക്കിയെടുക്കാൻ സാധിക്കും. ഇനി നമുക്കിത് ഓവനിൽ എങ്ങനെയാണ് ഉണ്ടാക്കിയെടുക്കുന്നത് നോക്കാം. ഓവനിലാണ് എന്നുണ്ടെങ്കിൽ പല ടൈപ്പ് മെത്തേഡുകൾ ഉണ്ട്. അതായത് റോസ്റ്റിംഗ് മെത്തേഡ് ആണെന്നുണ്ടെങ്കിൽ 10 മിനിറ്റ് വരെ അത് റോസ്റ്റ് ചെയ്യുക. ഇനി ബേക്കിംഗ് ആണെന്നുണ്ടെങ്കിൽ 12 മിനിറ്റ് വരെ ബേക്ക് ചെയ്യാം. അതുപോലെ തന്നെ മൈക്രോവേവ് ആണെന്നുണ്ടെങ്കിൽ അതും ഒരു 10 മിനിറ്റ് വരെ മൈക്രോവേവ് ചെയ്ത് എടുത്ത് ഇതുപോലെ തന്നെ ഉണങ്ങിയ ശേഷം
Pro Tips
- Always dry garlic completely — even a bit of moisture causes clumping.
- Add a pinch of salt while grinding to extend shelf life.
- Use dehydrator or low-heat oven for a faster drying process.
നമുക്ക് ചൂടാറി കഴിയുമ്പോൾ മിക്സിയുടെ ജാറിൽ ഇട്ട് പൊടിച്ചു എടുക്കാം. വെളുത്തുള്ളി പൗഡർ നമുക്ക് എല്ലാ കറികളിലും ഉപയോഗിക്കാൻ സാധിക്കും. അതിപ്പോ കറികളിലായാലും ഉപ്പേരി ഉണ്ടാക്കുമ്പോൾ ഇനി അച്ചാറുകളും ഉണ്ടാകുമ്പോൾ ആണെന്നുണ്ടെങ്കിലും ഉപയോഗിക്കാം. അല്ലെങ്കിൽ അതുപോലെയുള്ള ഐറ്റംസ് ഒക്കെ ഉണ്ടാക്കുമ്പോൾ നമുക്ക് ഉപയോഗിക്കാം. അതുപോലെ തന്നെ മയോണൈസ് ഉണ്ടാക്കുമ്പോഴും യൂസ് ചെയ്യാം. Homemade Garlic Powder Credit : Curry Vep
Homemade Garlic Powder Making
Garlic powder is one of the most essential kitchen ingredients — perfect for seasoning, marinades, and instant flavor in recipes. Store-bought garlic powder often contains preservatives, but making it at home is simple, healthy, and more aromatic. This easy method ensures long shelf life and pure homemade goodness every time you cook.
Top Benefits
- Pure and Chemical-Free – No additives or preservatives.
- Cost-Effective – Save money compared to store-bought options.
- Long Shelf Life – Stays fresh for months when stored properly.
- Enhanced Flavor – Freshly made powder gives stronger aroma.
- Time-Saving – Easy to use in everyday cooking without peeling garlic.
How to Make
- Peel Fresh Garlic – Take 2 cups of peeled garlic cloves.
- Slice Thinly – Cut each clove into thin, even slices for uniform drying.
- Dry Completely –
- Sun-Dry Method: Place slices on a tray under sunlight for 2–3 days.
- Oven Method: Bake at 60°C (140°F) for 2–3 hours until crisp.
- Grind into Powder – Once dry, blend the garlic slices into a fine powder.
- Store Properly – Keep in an airtight glass jar away from moisture.
Smart Kitchen Tips
- Add a pinch of salt during grinding for longer freshness.
- Avoid wet spoons when using the powder.
- Use dry grinder jars only for better texture.
- You can also make garlic flakes for soups and marinades before powdering.
FAQs
- How long does homemade garlic powder last?
Up to 6 months if stored in a cool, dry place. - Can I use old garlic?
Use only fresh cloves for best aroma and flavor. - Can I mix it with salt?
Yes, you can make garlic salt by adding sea salt in a 3:1 ratio. - Why did my powder turn sticky?
Moisture in garlic or storage causes clumping — ensure complete drying. - Can I make this without oven or sun?
Yes, use a dehydrator or air fryer at low temperature for even drying.