വെറും 10 രൂപ ചിലവ്! ഇനി ഇന്റർലോക്ക് കട്ടകൾ വീട്ടിൽ എളുപ്പം ഉണ്ടാക്കാം! 5 മിനിറ്റിൽ അടിപൊളി മുറ്റമൊരുക്കാം! നൂറ്റാണ്ടുകളോളം കേടാവില്ല!! | Easy Interlock Tiles Making
Easy Interlock Tiles Making
Easy Interlock Tiles Making: Simple DIY Method for Strong, Durable & Low-Cost Flooring
Easy Interlock Tiles Making : Interlock tiles are widely used for outdoor flooring because they are durable, easy to install, and cost-effective. With basic materials and simple steps, you can make interlock tiles at home for courtyards, pathways, gardens, and parking areas—ideal for small projects and repairs.
Top Benefits of Homemade Interlock Tiles
- Low-Cost Flooring Solution – Saves money compared to factory-made tiles.
- Strong & Durable – Withstands heavy load and weather conditions.
- Easy Installation & Replacement – No permanent fixing needed.
- Custom Shapes & Sizes – Can be made as per space requirement.
- Ideal for Outdoor Use – Perfect for garden, driveway & walkway.
മുൻകാലങ്ങളിൽ നിന്നും വ്യത്യസ്തമായി ഇന്ന് എല്ലാ വീടുകളിലും മുറ്റത്ത് ഇന്റർലോക്ക് കട്ടകൾ ഉപയോഗിക്കുന്ന പതിവ് കൂടുതലായി കണ്ടുവരുന്നുണ്ട്. കാഴ്ചയിൽ ഭംഗിയും ക്ലീൻ ചെയ്യാൻ എളുപ്പവുമുള്ള ഇന്റർലോക്ക് കട്ടകൾ കടകളിൽ നിന്നും വാങ്ങി ഉപയോഗിക്കേണ്ടി വരുമ്പോൾ ഉയർന്ന വില നൽകേണ്ടി വരാറുണ്ട്. എന്നാൽ വളരെ കുറഞ്ഞ സാധനങ്ങൾ മാത്രം ഉപയോഗപ്പെടുത്തി കുറഞ്ഞ ചിലവിൽ
ഇന്റർലോക്ക് കട്ടകൾ വീട്ടിൽ തന്നെ നിർമ്മിച്ചെടുക്കാനായി സാധിക്കും. അത് എങ്ങനെയാണെന്ന് വിശദമായി മനസ്സിലാക്കാം. ഈയൊരു രീതിയിൽ ഇന്റർലോക്ക് കട്ടകൾ നിർമ്മിക്കാനായി അളവായി എടുക്കുന്നത് വലിയ ഒരു ഐസ്ക്രീം ബോട്ടിലാണ്. അതിൽ നാല് കപ്പ് അളവിൽ എം സാൻഡ്, മൂന്ന് കപ്പ് അളവിൽ ബേബി മെറ്റൽ, ഒരു കപ്പ് അളവിൽ സിമന്റ് എന്നിങ്ങനെയാണ് ഒരു കട്ട നിർമ്മിക്കാനായി ആവശ്യമായിട്ടുള്ളത്. അതോടൊപ്പം തന്നെ കട്ട നിർമ്മിച്ചെടുക്കാൻ
Pro Tips
- Use a proper interlock tile mould for uniform shape and strength.
- Mix cement : sand : jelly (1:2:3) for solid, crack-free tiles.
- Cure tiles in water for 7–10 days to increase durability.
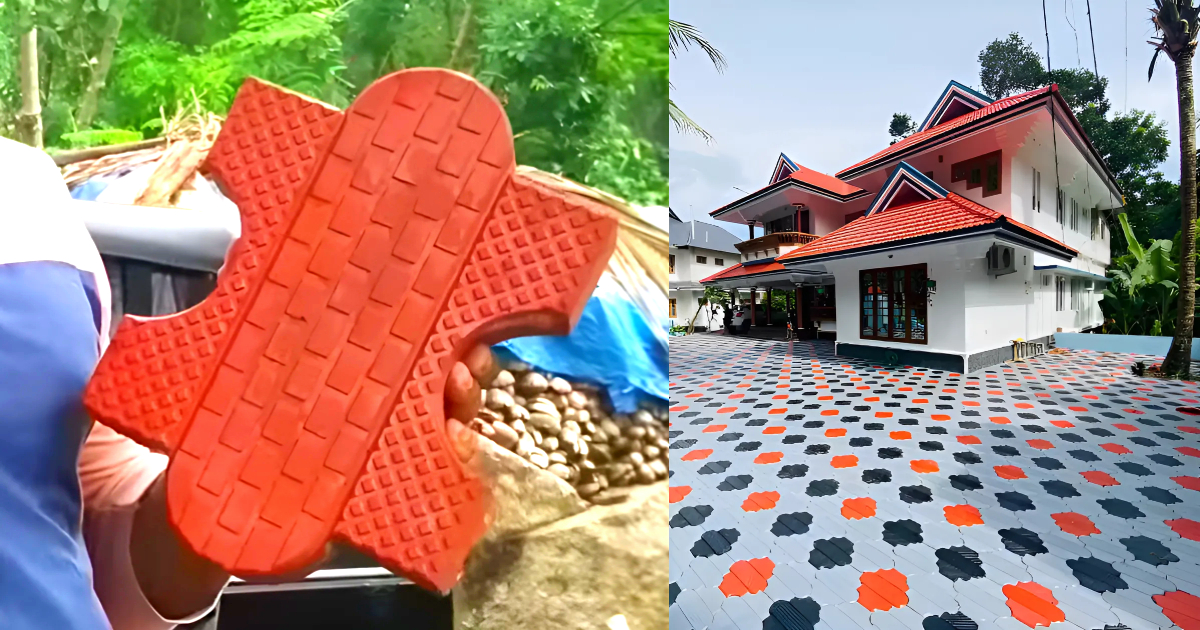
ആവശ്യമായ ഒരു മൗൾഡ് കൂടി ഉപയോഗിക്കേണ്ടതായി ഉണ്ട്. ആദ്യം തന്നെ അത്യാവശ്യം വലിപ്പമുള്ള ഒരു സിമന്റ് ചട്ടിയെടുത്ത് അതിലേക്ക് എടുത്തുവച്ച എം സാൻഡ്, ബേബി മെറ്റൽ, സിമന്റ് എന്നിവ ചേർത്ത് നല്ലതുപോലെ മിക്സ് ചെയ്ത് എടുക്കുക. അതിനുശേഷം ആവശ്യത്തിനുള്ള വെള്ളം കുറേശ്ശെയായി ഒഴിച്ച് സിമന്റിനെ കട്ടിയുള്ള രൂപത്തിൽ ആക്കി എടുക്കണം. ഏത് ഷെയ്പ്പിലാണോ കട്ട നിർമ്മിക്കേണ്ടത് ആ ഷേയ്പ്പിൽ ഉള്ള മൗൾഡ് എടുത്ത് അതിനകത്ത് എണ്ണ തടവി കൊടുക്കുക.
ആദ്യത്തെ ലെയറായി അല്പം സിമന്റ് കൂട്ട് നിറച്ച് നല്ലതുപോലെ തട്ടി കൊടുക്കണം. ശേഷം തയ്യാറാക്കി വെച്ച എം സാൻഡിന്റെ കൂട്ടുകൂടി ചേർത്ത് ഉണങ്ങാനായി ഒരു ദിവസം മാറ്റിവയ്ക്കാം. അതിനുശേഷം ഇന്റർലോക്ക് കട്ട മൗൾഡിൽ നിന്നും അടർത്തിയെടുത്ത് വെള്ളത്തിൽ കുറഞ്ഞത് 10 മുതൽ 15 ദിവസം വരെ ഇട്ടുവയ്ക്കണം. വെള്ളത്തിൽ നിന്നും എടുത്ത എം സാൻഡ് കട്ടകൾ ഒന്നുകൂടി വെയിലത്ത് വെച്ച് ഉണക്കിയ ശേഷം ആവശ്യാനുസരണം ഇഷ്ടമുള്ള നിറങ്ങൾ നൽകി ഉപയോഗിക്കാവുന്നതാണ്. കൂടുതൽ വിശദമായി മനസ്സിലാക്കാൻ വീഡിയോ കാണാവുന്നതാണ്. Easy Interlock Tiles Making Credit : Jilz World
Easy Interlock Tiles Making
Interlock tiles are widely used for outdoor flooring, walkways, parking areas, and garden paths because they are strong, durable, and easy to maintain. With simple materials and proper steps, interlock tiles can be made easily using molds at home or on a small scale.
Top Benefits
- Strong & Durable – Ideal for heavy foot traffic and outdoor use.
- Cost-Effective – Cheaper than buying ready-made tiles.
- Custom Shapes & Colors – Can be made in different designs using molds.
- Easy Installation – No need for cement plastering during laying.
- Low Maintenance – Easy to clean and replace damaged tiles.
How to Make Interlock Tiles
- Prepare the Mold – Use plastic or metal interlock tile molds. Clean and apply light oil inside for easy removal.
- Mix Raw Materials – Combine cement, sand, and stone dust in the ratio 1:2:3. Add water gradually to make a thick mix.
- Add Color (Optional) – Mix oxide color powder with cement for colored tiles.
- Fill the Mold – Pour the mixture into the mold evenly.
- Compact Properly – Use hand tamping or vibration to remove air gaps and increase strength.
- Level the Surface – Smooth the top using a trowel.
- Initial Setting – Keep the filled mold undisturbed for 24 hours.
- Demold Carefully – Remove the tile gently from the mold.
- Water Curing – Soak tiles in water or sprinkle water twice daily for 7–14 days.
- Dry & Use – After curing, air-dry the tiles before installation.
FAQs
- Which cement is best?
OPC or PPC cement works well for interlock tiles. - Can I make tiles without a machine?
Yes, hand compaction works for small-scale production. - How long before tiles can be used?
After 14 days of proper curing. - Are homemade tiles strong?
Yes, if correct mix ratio and curing are followed. - Can tiles crack easily?
Cracks occur if curing is improper or water ratio is wrong.